Hi again. I haven’t published content to the blog for almost a year now, but I have been slowly adding micro improvements to the site itself here and there. This blog is built from barebones Astro.js, so by necessity I had to build everything I wanted myself. This post is not one project but a mix of five tiny ones.
(Since it’s been 10 months since my last post, I’ll share a quick update: I’ve been reading a few books, rotating various PC games, trying a couple of new hobbies, and I’m still taking care of my fish, who are doing well. And I traveled to a few new places.)
One of the first improvements I sorely needed was optimizing image sizes. This was especially true after I published the aquarium project, a mega post with 40+ png and jpeg images. Some of the images I used were also unnecessarily large with an original size of thousands of pixels wide, and multiple megabytes in file size.
I decided I would need to do two things, 1. convert to webp, a relatively new (2018) image format with generally superior compression over png and jpeg, and 2. resize the displayed images down to some useful width.
In order to convert a single image and resize it down, you can use mogrify like this.
mogrify -resize 800x -format webp goldfish2.jpg
Since all my images were moved to Cloudflare R2, I downloaded all of them, preserving the directory structure, then ran the following commands to convert all the rest of my images:
find . -iname '*.jpg' -exec mogrify -resize 800x -format webp {} +
find . -iname '*.jpeg' -exec mogrify -resize 800x -format webp {} +
find . -iname '*.png' -exec mogrify -resize 800x -format webp {} +
After this, all I need to do is reupload everything to R2, then, in my code, do a mass CTRL-F of the photos embedded in the blog posts using extensions .jpeg/.jpg/.png, replacing them with .webp. Look at the significant reduction in size, sometimes leading to a 10x reduction:
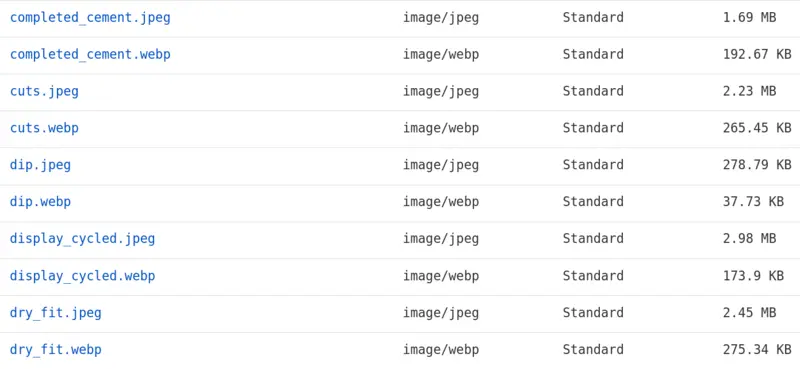
The mogrify commands I ran didn’t overwrite the original but just saved a new copy alongside it. I still upload both to R2, but only embed the .webp in the blog post. I wanted to preserve the uncompressed original photo in case someone wants to download it. For any webp image on this blog, you just need to replace the .webp extension with .jpeg or .jpg or .png to obtain the original.
With images now optimized, the next thing to look at are implementing image previews for the posts on the homepage. As a reminder, every post on this blog is a markdown file with a header section containing metadata, title, date, description, that are props (properties) of the page. They vary between each post. These props are then read by a PostPreview.astro component when it displays on the home page.
To implement image previews the solution is pretty simple. I just need to create a new photo URL metadata property, image, and have that read by the PostPreview component and styled. Here’s what the metadata section would look like.
---
layout: ../../layouts/PostLayout.astro

title: "Aquarium Engineering"
date: "2024-08-22"
description: "Constructing and plumbing a display-refugium system with an ecosystem of bacteria, plants, shrimp, and fish."
image: "https://i.ken.computer/static/2024-08-22-aquarium/whole_tank.webp"
---
Then, improving the structure and styling of PostPreview.astro:
---
const posts = Astro.props;
---
<style>
    // ...
    .image_preview_container {
        width: 100%;
        height: 200px;
        padding-bottom: 10px;
    }
    .image_preview {
        border: none;
        width: 100%;
        height: 100%;
        object-fit: cover;
        object-position: left;
    }
</style>
<div class="post">
    <a href={posts.post.url}>
        <div class="image_preview_container">
            <img class="image_preview" src={posts.post.frontmatter.image}>
        </div>
        <div class="title">{posts.post.frontmatter.title}</div>
        <div class="description">{posts.post.frontmatter.description}</div>
        <div class="date">{posts.post.frontmatter.date}</div>
    </a>
</div>
Implementing tags follows the same procedure as image previews above, but is a bit more complicated because it involves a new component that should support multiple different tags with unique styling.
After adding a new tag prop, I created a new component called TagPill.astro to style the tag as it will be displayed in the post preview component.
---
const tag = Astro.props.tag;
---
<style>
    .tag {
        font-family: "Fira Code", monospace;
        font-size: 13px;
        border-radius: 8px;
        padding: 4px;
        margin-right: 10px;
        color: rgb(26, 26, 26);
    }
    .tag.dev {
        background-color: rgb(99, 180, 246);
    }
    .tag.ops {
        background-color: rgb(246, 99, 99);
    }
    .tag.essay {
        background-color: rgb(133, 246, 99);
    }
    .tag.diy {
        background-color: rgb(246, 231, 99);
    }
    .tag.gadget {
        background-color: rgb(155, 99, 246);
    }
</style>
<a class={`tag ${tag}`} href={`/tag/${tag}`}>#{tag}</a>
I used different colors for the pill depending on what the tag is. It knows what styling to inherit by the class name being added. Its name that is identical to what the tag itself is.
Notice the tag is not just stylistic: it’s an <a> element with an href. My intention here is to allow visitors to filter the posts which share any one tag. With the href, if you click on the tag itself, this will direct you to a special page, named on the backend, exactly, tag/[tag].astro. This page implements a script that will grab only the posts which contain that tag.
---
import BaseLayout from '../../layouts/BaseLayout.astro';
import PostPreview from '../../components/PostPreview.astro';
import TagPill from '../../components/TagPill.astro';

export async function getStaticPaths() {
	const allPosts = await Astro.glob('../posts/*.md');
	const uniqueTags = [...new Set(allPosts.map((post) => post.frontmatter.tags).flat())];
	return uniqueTags.map((tag) => {
	const filteredPosts = allPosts.filter((post) => post.frontmatter.tags.includes(tag)).reverse();
		return {
			params: { tag },
			props: { posts: filteredPosts },
		};
	});
}

const { tag } = Astro.params;
const { posts } = Astro.props;
---
...
<BaseLayout>
	<div id="filter"><img class="search_emoji" src="/magnifying-glass.svg"/>Search: <TagPill tag={tag}/></div>

	<div class="columns">
		{posts.map((post) => <PostPreview post={post}/>)}
	</div>
</BaseLayout>
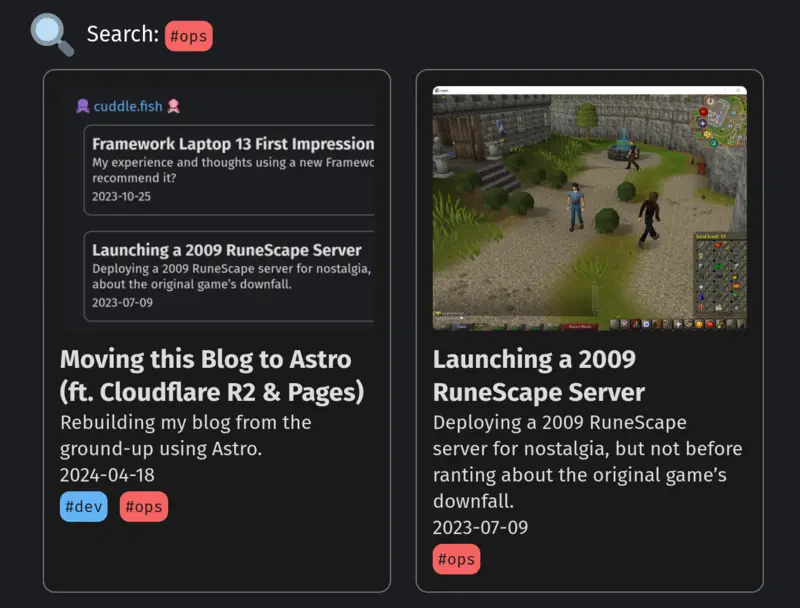
For example, if we click #ops on any post now, this will filter down to the posts which have the #ops tag attached:
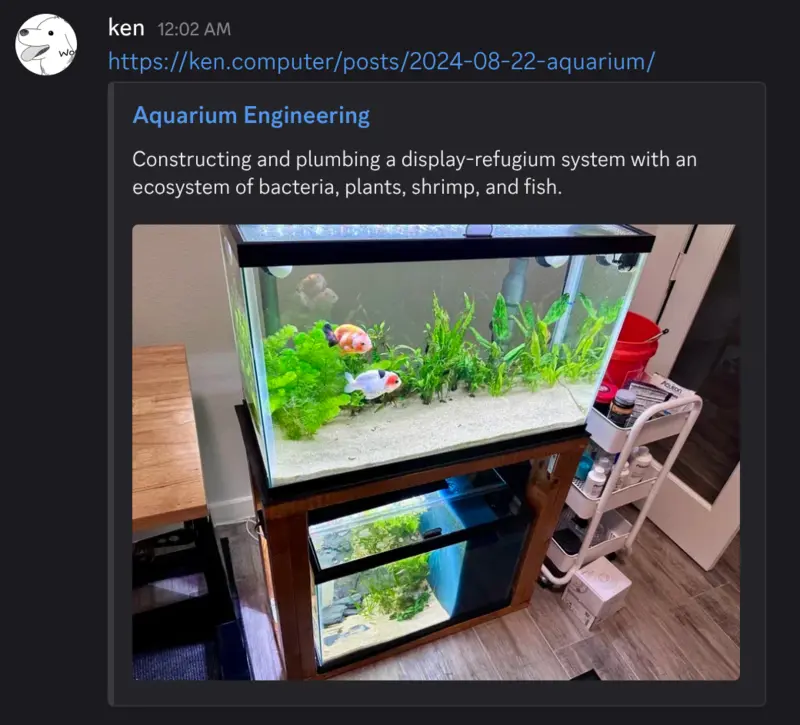
The last thing I wanted to add were Rich Previews. Rich Previews are the title and/or image which accompany a link on social media or chat apps. This doesn’t happen automatically, and they need to be set via tags. When I post a link to one of my posts on Discord, it appears as just the plain URL.
I want to improve this by displaying the page metadata and an image. This is possible using OpenGraph and Twitter metadata tags, and is easy to implement. To do it, I just need to add a dozen metadata tags to the PostLayout.astro layout, and have them read from the post’s frontmatter.
<BaseLayout>
	<head>
		<meta name="description" content={frontmatter.description}>

		<meta property="og:url" content={Astro.url}>
		<meta property="og:type" content="website">
		<meta property="og:title" content={frontmatter.title}>
		<meta property="og:description" content={frontmatter.description}>
		<meta property="og:image" content={frontmatter.image}>

		<meta name="twitter:card" content="summary_large_image">
		<meta property="twitter:domain" content="ken.computer">
		<meta property="twitter:url" content={Astro.url}>
		<meta name="twitter:title" content={frontmatter.title}>
		<meta name="twitter:description" content={frontmatter.description}>
		<meta name="twitter:image" content={frontmatter.image}>
	</head>
	<div>
		<h1 id="title">{frontmatter.title} [blog]</h1>
		<div id="description">{frontmatter.description} [{frontmatter.date}]</div>
		<div class="tags">{frontmatter.tags.map((tag) => (<TagPill tag={tag}/>))}</div>
	</div>
	<slot/>
</BaseLayout>
All blog post pages will now have these meta properties. If you ever post a link to my blog somewhere, it will now display the title, description, and image in an aesthetic preview.