I’ve been working on a pet tool that lets me manage EC2 instances through Discord.
I originally built it with the intention to manage one specific server, but I’ve since carried over its utility to a few other servers. I’ve been using it to do simple AWS tasks from my phone’s Discord app and it’s been unbelievably convenient.
My friends and I have recently been playing Valheim together.

Valheim’s developer doesn’t offer any free hosted multiplayer servers, so it’s left up to the player to run their own dedicated server.
As the group DevOps person, I’m naturally responsible for setting up the infrastructure.
I found a Valheim container image and launched it directly to an AWS EC2 instance. The instance provides 4 GB of memory, sufficient for four or five concurrent players.
It costs $30 to run the server continuously for one month.
To reduce spend, I’ve just been shutting the instance down when it’s not being used. This only works if I do so consistently.
And that’s the problem. I’m dependent on being around every time it needs to be started or stopped because I’m the only person with the permissions and know-how to do it.
Here are some alternatives I considered.
I want on-demand control to stop and start EC2 instances outside of directly logging on to AWS, also being intuitive enough for my friends to understand how to use.
I thought a Discord bot seemed ideal. It could start and stop the server on-demand in a familiar interface. Let’s walk through now how I actually built this thing.
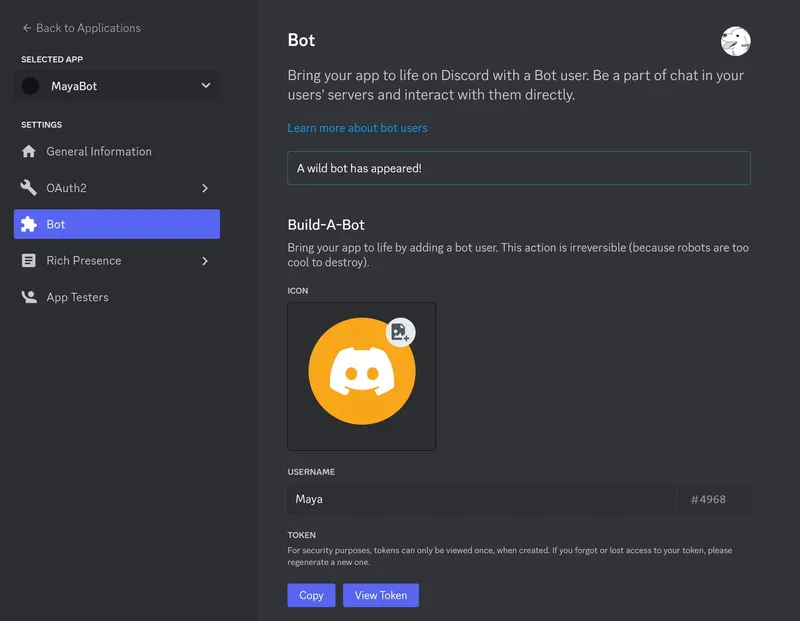
The first step to creating any new bot is registration.
I’m making a new application on Discord’s Developer Portal and also creating a new bot user for it. In contrast to typical human users, bot users have special Discord API access. Bot users also provide tokens which let programmatic applications log in to them.
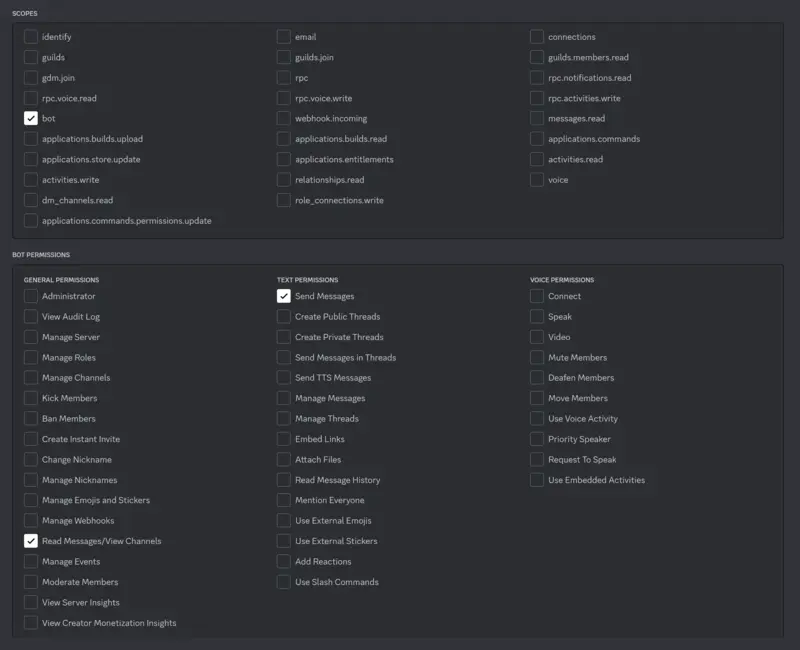
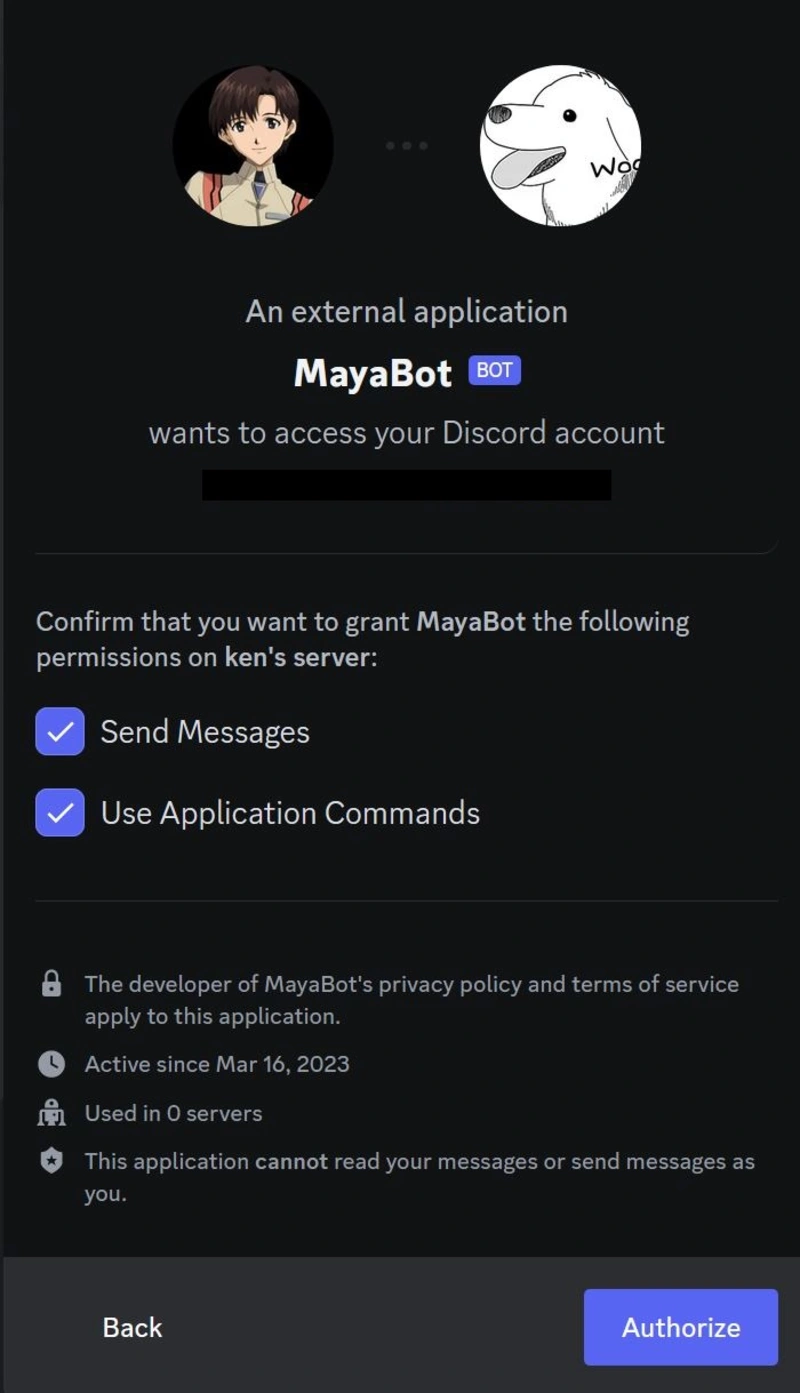
With the bot user created, I’m also configuring an invite link through OAuth2 which will give me a URL that will add the bot to the Discord server. I’m giving it bot scope, with permissions to read and write messages.
To summarize what to do:
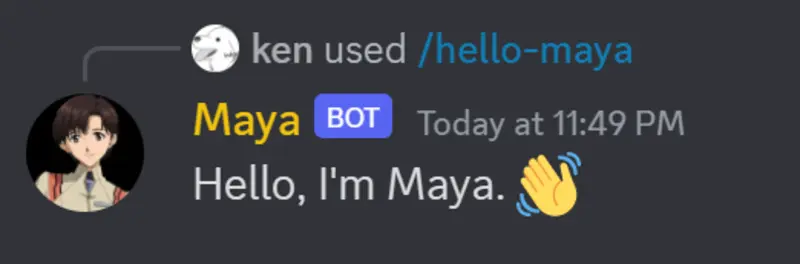
I’m naming my bot Maya, yet another reference to Neon Genesis Evangelion, this time after one of the series’ Magi computer technicians.
The last thing to do is open the provided link and join the bot to a Discord server.
Before I go any further, and so you won’t get lost with this upcoming section, let’s quickly walk through how a bot program connects with the bot user we just created.
So far, Maya’s bot user has already been added to a server. We can grant or deny specific users of the server permissions to execute commands using Maya if we want to.
In my AWS account, I’m going to be launching an instance that will run a bot logic program. The logic program will execute commands to do certain AWS actions that I would otherwise do manually, like listing my EC2 instances. The instance that the logic program is running on will also need to be granted AWS permissions to be able to actually perform those actions (such as Allow - ec2:ListInstances).
When I start the program, I will be providing it with the bot token we obtained earlier. With this token, it can “log in” as the bot user and listen in the Discord server for chat commands. When the bot “hears” a command, it will execute the relevant logic.
In short, we are going to program a bot logic program to do some AWS actions for us, and configure it to listen to Discord chat to know when to execute.
Let’s begin development now. For simplicity, I’m going to focus on showing you how I built one command, /describe-instances, out of Maya’s (currently) five total commands.
Maya’s logic program is written in Go. I’m using a Go bindings for Discord package, discordgo.
The first thing I’ll do is define a command called describe-instances, whose Name and Description are what will appear in the Discord server context menus.
var commands = []*discordgo.ApplicationCommand{
	{
		Name:        "describe-instances",
		Description: "Get a list of all instances manageable by Maya.",
	}
}
Commands need corresponding handlers. I’ll make one now for describe-instances. When the command is called in Discord chat to the bot, it will trigger this handler.
This gets a list of the instances in my AWS account, then formats the results into a table. Notice the handler below calls describeInstances(), which will do the actual talking to the AWS API.
var commandHandlers = map[string]func(s *discordgo.Session, i *discordgo.InteractionCreate){
	"describe-instances": func(s *discordgo.Session, i *discordgo.InteractionCreate) {

			// Call another function to query AWS EC2 API.
			describeInstancesOutput, err := describeInstances()
			if err != nil {
				fmt.Println(err)
				s.InteractionRespond(i.Interaction, &discordgo.InteractionResponse{
					Type: discordgo.InteractionResponseChannelMessageWithSource,
					Data: &discordgo.InteractionResponseData{
						Content: "Could not describe instances.",
					},
				})
				return
			}

			// Format the results into a codeblock created with backticks (```)
			// Each line it prints should contain the instance's name, id, and state
			instanceList := describeInstancesOutput.Reservations
			var results string
			results += "```"
			for _, j := range instanceList {
				for _, k := range j.Instances[0].Tags {
					if *k.Key == "Name" {
						results += *k.Value
					}
				}
				results += "\t"
				results += *j.Instances[0].InstanceId
				results += "\t"
				results += *j.Instances[0].State.Name
				results += "\n"
			}
			results += "```"

			// Send the formatted message to the channel.
			s.InteractionRespond(i.Interaction, &discordgo.InteractionResponse{
				Type: discordgo.InteractionResponseChannelMessageWithSource,
				Data: &discordgo.InteractionResponseData{
					Content: results,
				},
			})
		}
}
I’ll write the describeInstances() function now. It will contain the EC2 API calls to fetch my instance information.
The AWS SDK for Go is another enormous library that will provide access to AWS services. For this example I only care about one EC2 service call: DescribeInstances.
func describeInstances() (*ec2.DescribeInstancesOutput, error) {
	// Open a new AWS session.
	sess, err := session.NewSession(&aws.Config{
		Region: aws.String("us-east-2")},
	)
	if err != nil {
		fmt.Println(err)
		return nil, err
	}

	// Create a client to run EC2 calls.
	ec2_client := ec2.New(sess)

	// Run describe instances to get all EC2 information indiscriminately.
	result, err := ec2_client.DescribeInstances(nil)
	if err != nil {
		fmt.Println(err)
		return nil, err
	}
	return result, nil
}
Let’s stop again here to review how this is going to be used.
/describe-instances, to trigger the handler.describeInstances() function to talk to the AWS API, to get information about my EC2 instances.Since the bot will always be “listening” for messages, it will need to be running constantly. Given the little server resources the logic actually requires, I’m going to deploy it to the tiny AWS t3.nano VM.
The server doesn’t need any special ports open because the bot itself is logging into Discord to watch for new events. Since this is initiated from the server, it’s egress only.
IAM is an AWS tool that allows or denies AWS API actions to people or infrastructure. IAM would set a level of access that will allow the server with the bot code on it to actually do things in my AWS account.
In our case, Maya’s instance (the VM it is deployed to) needs permissions to execute AWS commands, like being able to ec2:ListInstances.
The trust policy is what allows types of things to use it. In our case, we want an EC2 instance to be able to use it.
{
    "Version": "2012-10-17",
    "Statement": [
        {
            "Effect": "Allow",
            "Principal": {
                "Service": "ec2.amazonaws.com"
            },
            "Action": "sts:AssumeRole"
        }
    ]
}
The permissions policy allows or denies specific actions in AWS. This is where we want to affirmatively allow the role to start, stop, describe instances, and describe their statuses.
{
    "Version": "2012-10-17",
    "Statement": [
        {
            "Effect": "Allow",
            "Action": [
                "ec2:StartInstances",
                "ec2:StopInstances",
                "ec2:DescribeInstances",
                "ec2:DescribeInstanceStatus"
            ],
            "Resource": "*"
        }
    ]
}
With the trust and permissions policies attached, we have a finished, usable role.
After we attached the role to the EC2 instance, we’ve successfully given it the ability to execute StartInstances, StopInstances, DescribeInstances, and DescribeInstanceStatus in our AWS account. All that’s left now is to run the bot on the instance and try it out.
I’ve SSH’d into the server, where I’ve cloned the https://github.com/kenellorando/maya project. At the time of this writing the project isn’t containerized, so the project is only available as raw Go code.
I’ll build the project first. This command will produce an executable file called maya in the same directory.
$ go build
Now, I can run the executable I just built to start the Maya logic program. It requires one argument, the bot user token we created earlier.
$ ./maya -token <token>
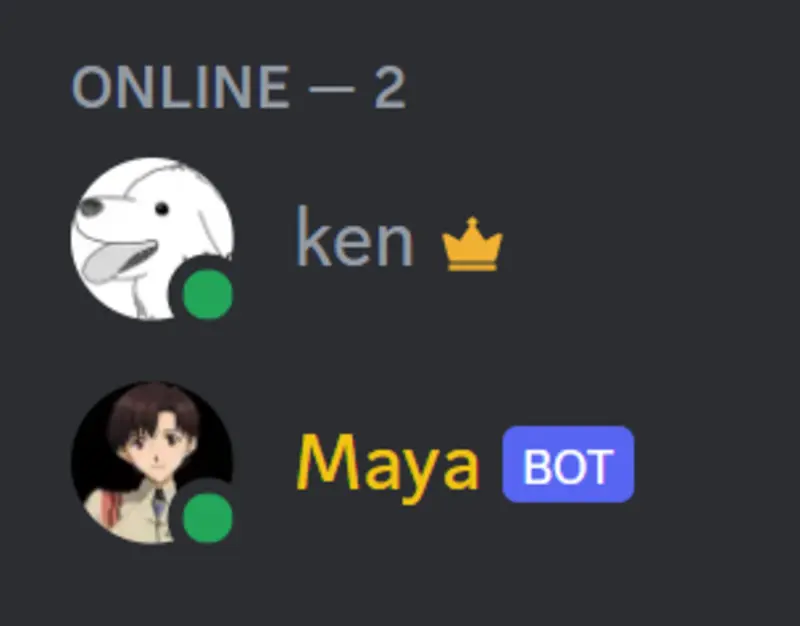
The bot is now up and running on the backend. Switching back to the Discord server, we can see that the bot now has online status!
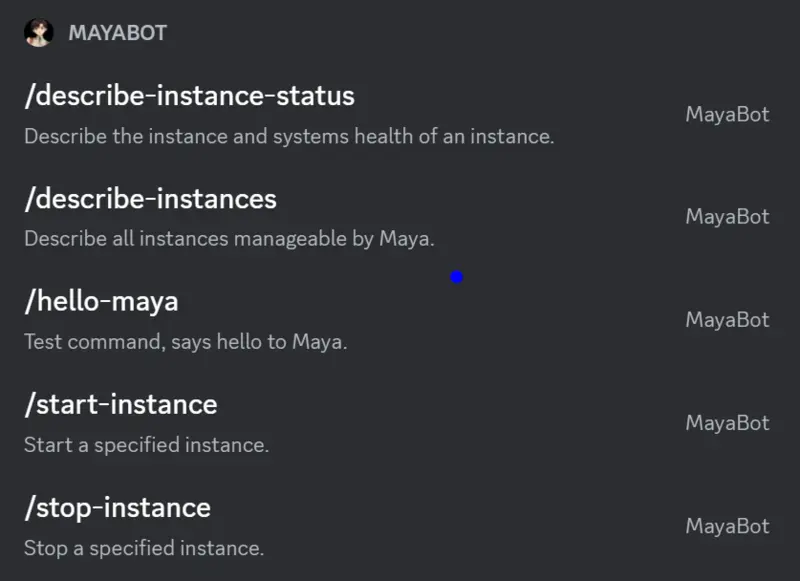
When I type a forward slash into the server chat, the describe-instances example (plus some others I made off-screen) show up in the context menu.
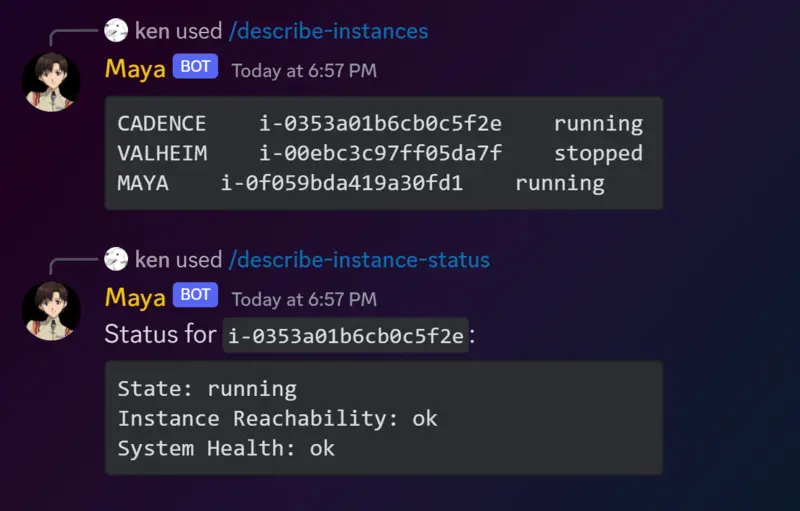
Let’s use /describe-instances to get the instance IDs, then trigger another command I wrote, /start-instance, which will turn on a stopped server.
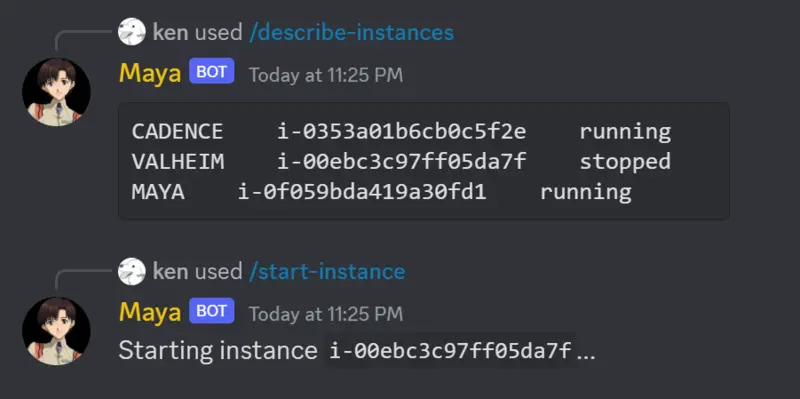
Checking the AWS console to verify, we can see the VALHEIM instance initializing!

We’ll wait a bit for the instance to complete starting up, then check the instance’s health with /describe-instance-status.
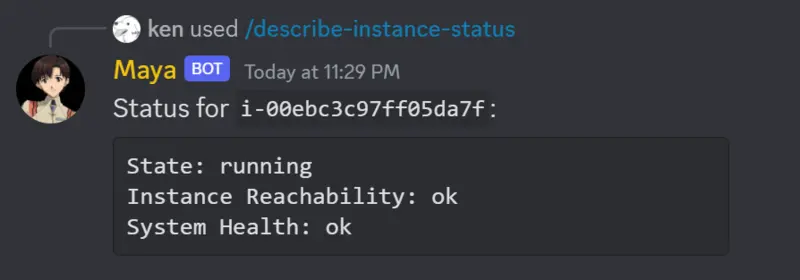
We’ll verify again that this output matches the AWS console.
Finally, we’ll stop the instance.

Confirmed:

Everything works!
A follow-up I’m considering is adding support for basic Kubernetes commands so that I could use the bot to administrate deployments on Kubernetes clusters. I also would like to containerize everything so it’s easier to ship and run, eliminating the go build steps.
That’s about it. Overall, I’m super pleased with the result. Goodbye for now and hello to Maya!